Sunday 31 July 2011

Girl in the Garden

It is the end of the weekend, and a busy one at that.  I can never believe how quickly the weekend flies by! At least I did get a chance to do a little bit of crafting in between the dishes and the laundry and tidying up etc. etc.

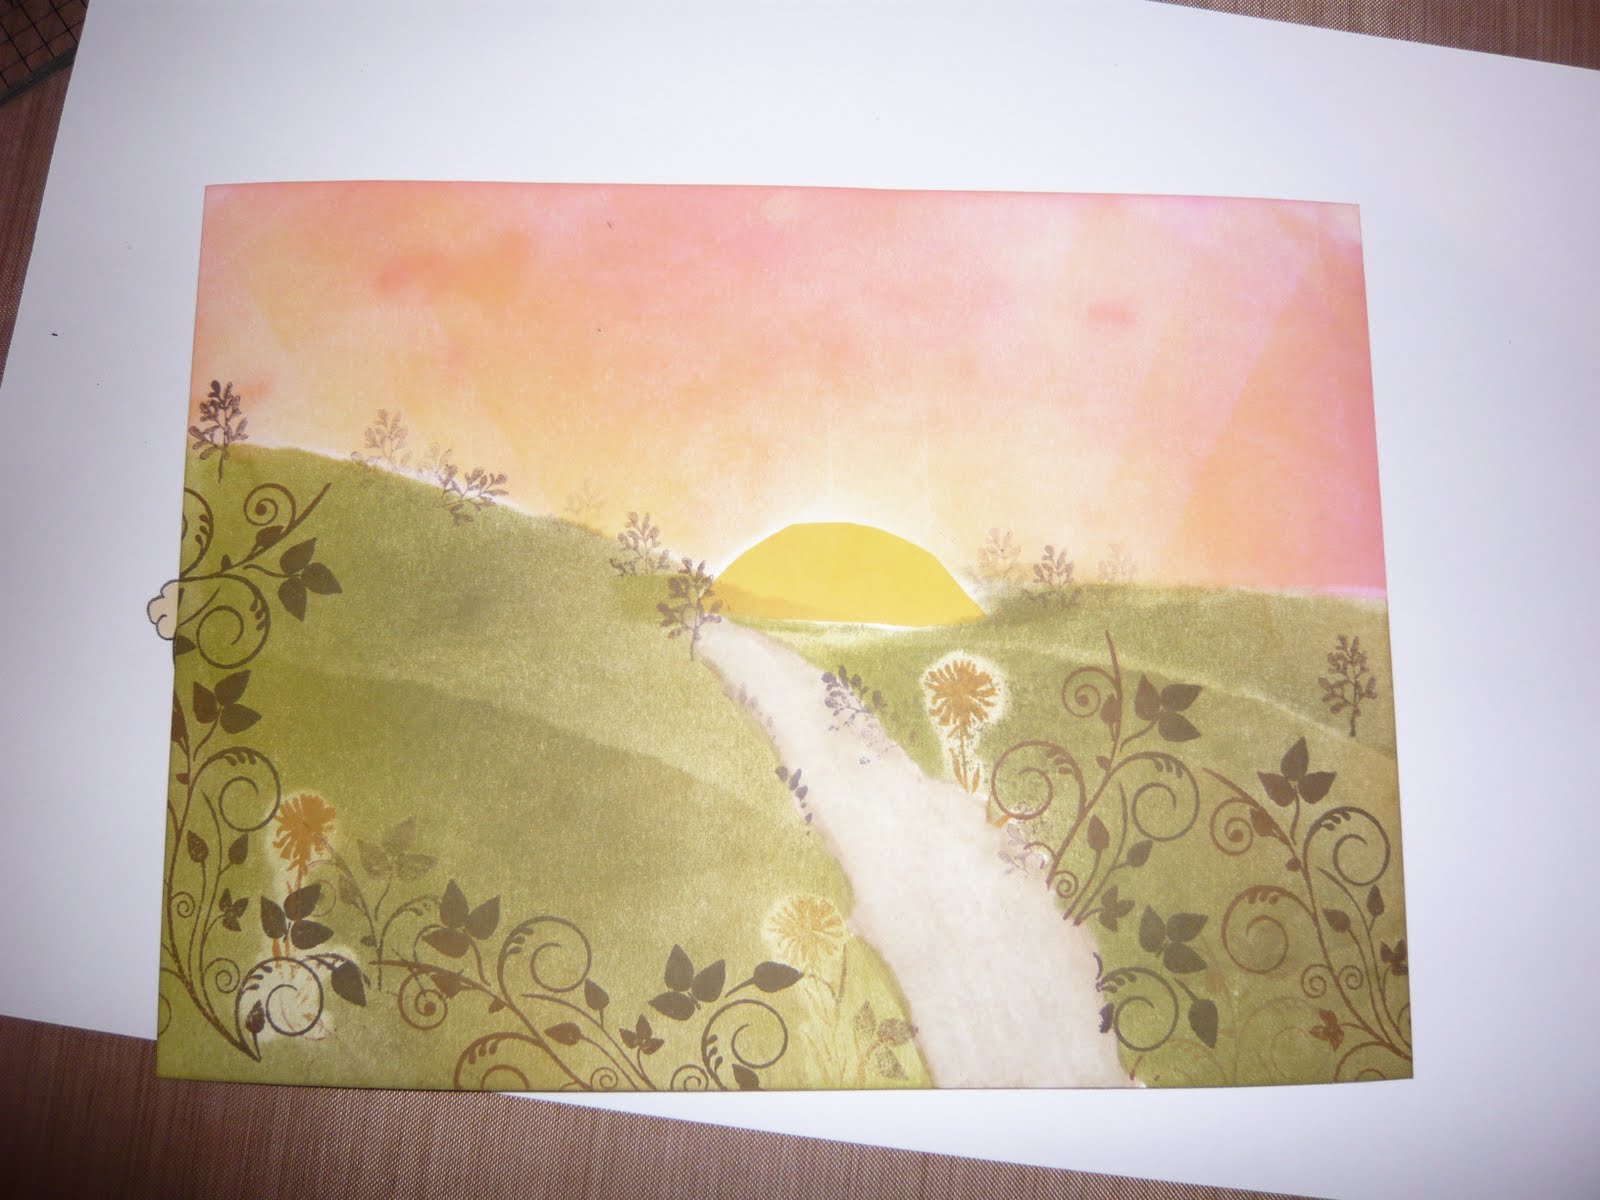
This card was inspired by the Polkadoodles weekly challenge.  The image came from the Double Sprinkles of Kraft CD and it is coloured with pro markers.  I used a Crafter's Companion embossing board to make the flower layers on some satin card and patterned cardstock.  The flowers at the bottom were made by colouring 250 gsm paper with pro markers, cutting out the petals with a tonic flower punch, and assembling them with hot glue.

I don't tend to do much crafting with 'people' on my cards, but I have to say, this little gal won me over.  

Girl in the Garden - Polkadoodles with Pro markers


I have entered this card in these challenges
(sorry if I miss any, I am new at this!)

Polka doodles: In an English Country Garden
Paper Playtime
I ♥ Promarkers

I have now also listed this card on Make it Monday

As always, I would love to know what you think, and welcome any feedback (good or bad).

Happy Crafting
xxDenise

Thursday 28 July 2011

Another Christmas Experiment

For those of you that follow my blog, you will probably have already sussed out that I am a bit of a miss mash of ideas and styles and techniques.  I am new to paper crafting, so I am working my way through everything and trying new things, and hopefully I will end up with a few nice cards along the way.


 Here is one that I am quite happy with.....

Blue pearl ornament


While I was working on a card for a challenge blog, I die cut one of the layers using my a deckled rectangle nestability.  When I was putting it back on it's little magnet sheet, I spotted my ornament shaped dies.  Inspiration struck, and as soon as I finished the challenge card, I die cut a few of the ornament shapes.  There they sat since yesterday.  I knew I wanted to do something, but I wasn't sure what.  Suddenly I thought, "Liquid Pearls"  On went the blue pearls and then I thought...it needs something else.  I added the white liquid pearls PVA from Cosmic Shimmer in every other section and the result was the ornament you see above. It actually reminds me of the ornaments that were on my Christmas tree growing up. 

Perhaps I ended up going a bit overboard with the snowflakes and embossing, but I think all in all it came together quite well. 

p.s.  In looking at the pic, I realise it looks a little askew.  This seems to be an optical illusion as the card itself is fine.  Guess taking proper photos will be the next thing I need to work on!

p.p.s.  My other ragdoll cat Lily thought the picture would be better with her in it...so I will include this one as well in her honour.

Happy Crafting
xxDenise

Penny Black Star

Well, it seems that I am a bit of an addictive personality.  Once I entered the Polkadoodles Christmas in July challenge, I was surfing around looking for other blogs and challenges for inspiration.  I was very happy to stumble upon the Penny Black Saturday Challenge Blog. 

Being a big fan of Penny Black artwork, and having a number of her stamp sets, I thought I would give this Saturday's Challenge a go.

As the theme was Starburst, and I am already in the Christmas card spirit, this A5 card is what I ended up with.

Penny Black Stars and Snowflakes
 I have been a bit daft, and misplaced the original packing for the stamp set, but it is one of the Penny Black transparent sets...obviously Christmas themed.  I am not sure if it comes across in the picture, but the bottom layer is a light blue glitter paper, then silver textured card, and then sky blue glitter card..  The blue embossed layer was done using blue coredinations card, an embossing plate I got two years ago (and have no idea what it is called or whom it is manufactured by), and the cuttlebug.  The little mouse is coloured using pro markers, and I used punches to make the little snowflakes out of off cuts of the light blue glitter paper and textured silver card layers.

I hope you like it, but if you don't please tell me why so I can learn.  Remember, I am new at all this stuff!

Happy Crafting
Denise xx

Monday 25 July 2011

docrafts Digital Designer Cards

Thus far, most of my blog's cards have been ones that I have coloured or stamped.  I do also make cards using pre-printed decoupage sheets and more recently, thanks to docrafts Digital Designer, and the introduction of Forever Friends images, I have been doing digital artwork for my cards.


I find that these cards are great fun to design and you even get to do some crafty bits once your components are printed out.  With decoupage, you are obviously doing the cutting and building.   This is one of the decoupage cards I made using the docrafts Forever Friends Retro Collection and the digital designer.


Decoupage Forever Friends Green and Gold

This next card is one that I designed completely using the digital designer.

Forever Friends Candy Cane stripes with dog

From the red and green striped layer 'forward', the images were put together using the backing papers, characters, embellishments and banners from the Forever Friends Retro Collection CD and the docrafts Digital Designer software.  I used some different textured papers for the layers underneath to add further dimension to the card.  I also used the Zig, gold wink of stella pen to outline the inside green layer as well as the greeting banner.  The bears were a single image, but the puppy was separate and was easily added. 

All in all, being new to digital crafting, and well crafting in general, I find it so wonderful to have so many choices in designing and making cards.  Each one is a little piece of artwork.  Actually, the cards I have been making are on the larger side, so my next challenge will be to try to make more standard sized cards!

As always, any feedback, good or bad, is greatly appreciated.  I am quite happy to learn something new every day :)

Happy Crafting
xxDenise

Sunday 24 July 2011

Polka Doodles Christmas In July Challenge

I have only been paper crafting really since December 2010 when I made decoupage cards for everyone on my list.  After a chance conversation at work, I was told about Create and Craft TV, which led to my introduction to pro makers and Polka Doodles.  Since then I have been addicted to both!

Well, in for a penny as they say!

Following the Polka Doodles blog, I saw the Christmas in July challenge and thought I would give it a go.  Here is what I ended up with.

Polka Doodles trees with Penny Black Mice Chorus
I used the tree from the Christmas Fun clear stamp set with some masking and layering for a more dimensional look.  In the front is a group of little caroling mice from one of the Penny Black clear stamp sets.  The colouring has of course been done with pro markers, and you might notice a Wink of Stella on the trees.  I just used a white fine liner pen for the snow in the sky and on the tree branches.  The ground cover is finished off with a bit of embossing and some glittery snow.

The card itself it Centura Pearl card stock with some snowflake card and silver mirror board for the matts and layers.

Well, hopefully this effort will make a reasonably good showing in the challenge.  Even if not though, I had fun making it and am even more in the Christmas spirit - even though it is only July!

Happy Crafting!
xx Denise

Friday 22 July 2011

Sprinkles Bouquet with Punch Flowers

When I am lucky enough to be able to get to my craft table (which is often guarded by my Ragdoll Cat Paddington).....


... I try to spread my crafting wings and give different techniques a go.  My sister-in-law's birthday is coming up, so I wanted to do something nice for her.  As it is being mailed from the UK to the US, and her birthday is on the 28th of July, it will probably get to her late.  It is the thought that counts though, right?  I suppose I can just send her the link to my blog so she can have a preview.  Besides, it is Paddington's fault really.

Anyway, here is the card....

Birthday Sprinkles Bouquet


I used the lovely bouquet 'black and white stampie' from the Double Sprinkes of Kraft CD and coloured it with my pro markers with highlights using a gold Zig Wink of Stella pen and a metallic gel pen in green.  The distressed and torn layers are from the Tim Holtz coredinations line.  Love the stuff! 

Because some of the flourishes on the bouquet are very fine, a couple of them got accidentally amputated so I was trying to think of a way to cover up some of these areas.  Then I thought of a punch flower technique I saw at Summer Crafting.  It was demonstrated at the My Craft Studio stall by Jodie, and if she happens to read this... I believe it now!  I coloured some 250 gsm white card stock with pink and yellow pro markers.  Then I used a tonic punch to cut out the flower layers and assembled them with Aleene's tacky glue.  This worked out well and gave the card a nice 3D component.

The inside is also decorated using images from the Double Sprinkles of Kraft CD.  Walter is coloured with pro-markers. I tried to give him a feathery / fluffy look.  The sentiment is straight off the CD - why mess with perfection!


More to come soon now that it is the weekend (if I can keep Paddington off the table)!

Happy Crafting
xx Denise

Tuesday 19 July 2011

Clarity Love Aperture

Now that I am making cards regularly, I need to make sure I give myself enough time to make cards for my friends and loved ones.  Realising that my friends 1st wedding anniversary is this month, I put together this card using Clarity Stamps and brayering techniques. Considering I had never done an aperture stamped image before, and my brayering skills are still developing, I am quite pleased with the end result.


Anniversary Card
 The colours may not be as visible on the picture, but the LOVE is embossed in purple with a grainy effect and the bottom mat is a lavender patterned paper that I picked up at Summer Crafting.  The sky and ground are brayered, both in and outside the aperture. 

This burgundy dots layer is about A5 size, so overall the card is a bit on the larger side, but as it is being hand delivered that shouldn't be a problem!

Bunny Blocks Baby Card

This card was a bit of an experiment inspired by a demo Nikki from Polka Doodles did on Create and Craft. 

The bunny and blocks were hand drawn by me and then scanned in to make them a smaller size.  The colouring is done with pro markers, and the colour 'swishes' on the background is also done with promarkers on acetate.  The bunny and blocks are attached to the acetate using pinflair glue for a bit of dimension, and then the acetate is attached to the next layer using small grommets. 

Hand drawn bunny with baby blocks on acetate

Winnie Owl Pro Marker Scene

 Here are a few more cards that I have finished recently.

Pro Marker Winnie Scene


This is a scene put together using Polka Doodles Double Sprinkle of Kraft CD and My Craft Studio.  The colouring has all been done with Pro Markers with of course a bit of matting and layering.  It is a large(ish) any occasion card.  It will probably go into the lot I am selling in November for Children in Need.


Tuesday 12 July 2011

Let it Snow

What would Christmas Cards be without snowflakes! 

I found it a bit challenging to think of how to use my snowflake embossing folder and snowflake spellbinder dies on Christmas cards, as snowflakes tend to be white and although beautiful, not necessarily interesting as the focal point on a card.

Thanks to Mr. Tim Holtz and his Coredinations card pack, I was having a bit of a play and decided to give my snowflake embossing folder a go.  I was pleasantly surprised with the result.


Coredinations snowflakes

After embossing and sanding, the snowflakes turned out to be a pale blue on the dark blue card.  This was not unexpected since the core color is clearly indicated on the edge of the card! Although it was nice, it wasn't quite enough of a contrast for the effect I wanted.  I thought maybe embossing powder...something sparkly.  I decided on an iridescent crystal glitter embossing powder, which unfortunately does not seem to be available anymore.  Typical!


Anyway, the embossing powder brought my winter wonderland to life, and the addition of some die cut snowflakes (cut from cetura pearl snow white card stock) and some ranger blue liquid pearls and stickles red glitter were nice finishing touches.....at least I think so.

Now I just have to get some more of the coredinations sheets and a similar embossing powder (hopefully I will have some luck at Summer Crafting).  These cards were fairly quick to put together and that is a promising trait for charity crafting.

Again, comments and suggestions are very welcome.

Happy Crafting
Denise xx

'Distressing' Christmas

Although I am a big fan of Clarity Stamps, I have to admit I use other stamps as well.  Here are a few of my other creations using distressing techniques here and there, and various stamps.  

Marble ink matt distressed poinsietta teddy
 On this one, I colored the stamp with pro-markers and distressed with the faded jeans distress ink (I think).  I used the deckled edge rectangle spellbinder die for the picture, and straight cut the other layers.  The layer with the red was made using Marbling Inks on 160 gsm uncoated paper if I am remembering correctly.  The darker blue layers and the card itself are pearl cardstock, and the ribbon is gold edged organza.

Card-io tree with blue distress

This one was inspired by designs shown at the Newbury Stamp expo.  Card-io has these fantastic snowflake stamps as well as the versa colour ink pads.  I stamped and embossed the 'garland' first, then stamped the snowflakes in various colors to make up the tree itself.  The background is also distressed with faded jeans distress ink.  The layer underneath is a really nice textured card that I picked up at the Newbury show as well.

    
Coredinations stamped wreath
 This one is probably my favorite, even though it could have been a bit better.  I used a different Card-io stamp set (Christmas Bouquet I think) and versa color ink.  The mount behind the stamped image is from the Tim Holtz Coredinations card pack, embossed with the brick embossing folder, sanded and lightly distressed with scattered straw.  Another sheet of the textured card (red card) made it behind the stamped layer. (It really was a bargain and perfect for Christams stuff!)  The final layer is a brushed gold satin card stock.


Anyway, if slow and steady wins the race, I should be all set for the end of November when these cards go out for sale to raise money for Children in Need.  It is difficult though, because each is a labour of love, and I find it hard to let them go to strangers..lol.  

I hope you like my creations, but I am open to feedback (good or bad) as I am only just learning.
Happy Crafting!!
xxDenise

Sunday 10 July 2011

Christmas Clarity Projects

Well, here are my first attempts at using Clarity Stamps for Christmas cards.  I find that each project I do opens up ideas for more and more projects.

Reindeer with Pinescape and star


This was my first attempt using my lovely new spruce-scape Clarity stamp, as well as the star and the reindeer, which are also Clarity Stamps (sensing a trend are we?)  I used some embossing on the 'snow', including some puffy white.  It came out alright, but not quite the way I had intended.

I got some feedback (from Nina) that it would be better to have two reindeer, so this was the next generation.

Two Reindeer with Pinescape and star

I have to agree, the two reindeer do make the star more of a focal point.  I was a bit happier with the ground as well.  I used the ice grey 1  promarker to add shading under the trees and double embossed the snow.   First I used the versamark pad and dabbed it on to emboss with white.  Then I used the versamark pen to put some streaks in, which I then embossed with crystal iridescent embossing powder.  Looking at it here, I am thinking that next time I can go a bit darker / deeper on the sky, and I need to do something different with the star, though I am not sure what.

Although my masking is improving, I still have to get to grips with some of the detail work and actually putting the card together.  Rather than cutting the card to size or adding another matt / layer, I just put some green sparkle dots down the edges (not very evenly I hasten to add).  Maybe I should take a page out of Claire Curd's book and make my toppers to match my card sizes...  live and learn.

Finally, I used Barbara's recent C&C demonstration to make this next card.

Distressed holy and ivy

For this card, instead of going for the bright gold like Barbara demonstrated, I decided to see how it would look with a bit of distressing.

I embossed the two holy and ivy stamps and the Merry Christmas using Tim Holtz tea bag embossing powder.  Fantastic result as it looks almost like copper or brass.  I must say though it is difficult to be sure when the embossing powder has 'gone'.  Unless I did something wrong, it keeps a bit of a gritty feel even when it has been fully heated and cooled.

I used pro-markers to color in the ivy and holy, and then distressed the edges of the card with tea bag Distress Ink.

Anyway, that is my progess so far.  Please feel free to let me know what you think (or if you have any suggestions). :)

Happy Crafting!

Saturday 9 July 2011

Early Clarity Projects

Shortly after discovering Create and Craft TV, I was thrilled to see one of their demonstrators, Barbara Gray, and her line of Clarity Stamps.  It wasn't only the apparent high qualilty of the clear stamps and the unique mounts that caught my attention, but her lovely brayering techniques.

As someone who had never done card making or stamping, I was intimidated, but decided to order one of the stamp sets and give it a try.  That was all it took to hook me forever.  My clarity stamp collection is constantly growing, and hopefully my techniques are also improving.  I just wanted to show a few of my first efforts.

Mine is on the bottom with the floating roof tree.  Nina's is on top


Not too shabby for a first try.  We did learn that you want to limit your promarker use on the glossy paper.  It works, but tricky to stop it from streaking.

Next up:
The piece of work
The finished card


This was for a retirement card for a work colleague.


Most recently:

With this one I used the scarecrow stamp, which I got as a member of Barbara's project club as well as her cottage, some of her foliage stamps and the naked tree (dressed of course).  I used distress ink for the sky and the ground, but brayered the ground and distressed the sky.

My masking techniqe needs work, but I think I am getting better!

That's all for now, but there will be some Christmas Clarity projects following shortly.

My Weight Loss Journey